Total Pageviews

Sunday, 25 November 2012

How I Style: Army Jackets

Hey Guys!
So it's been ages since my last post cause I had loads of work and such, so been really busy! But thought I would make it up to you guys by having four outfits this time! Military has been a huge trend this season and been seen on all the big celebrities, designer catwalks and magazines. I invested in this khaki camouflage jacket a week ago from Cedar Wood State and it's a perfect piece for this trend as the colours are actually quite muted meaning that it won't clash and stand out against many things. I know a lot of people are getting into this trend and camouflage is quite a hard pattern to style with as it is quite out there.
FYI I got this jacket in an XS so they do come over sized, because trust me, I am not an xtra small that's for sure! 


First outfit (above): polar neck jumper- Jigsaw, wet-look leggings- Miss Selfridge, ring- Accessorize, nails- nude by pop Beauty, shoes- Office, lips- lipglass in Cultured by MAC.


 Second outfit: knit cardigan- Primark, lace skirt- (actually made this myself! It was my project in the summer that I made from some lace material from John Lewis and turned out really well. I will probably make another post showing some of the things I have made myself later on, so watch out for that!), shoes- Office (bit addicted to Office shoes as you'll come to realise!)


 Third outfit: shirt- DIY studded shirt from Oasis, tights- just M&S. I then added my maroon skater skirt from Primark, which I felt made the outfit more feminine.


 Forth outfit: top- Topshop, wet-look leggings- Miss Selfridge, earrings- Diva by Miss Selfridge.
I feel this last outfit adds a bit of colour, which is really hard to pair with camouflage but I liked the clashing patterns in the outfit!
Anyways, I really hope you liked my more fashion based post this week, and I promise I won't be as long next time to post!
 Enjoy xxxx


Sunday, 11 November 2012

Edinburgh

Hey Guys!
So this week I thought I would do something a bit different and include more art than fashion in this post! I have been really ill the past few days so haven't posted anything but I thought I would do this post on some photos that I had taken a while back! I had actually been on a weekend photography course a couple weeks back when I took the shots, as I had just gotten my new camera and wanted to get advice on how to get the best out of the camera! The course consisted of chatting in a group (there was 7 of us) about all the technical things about cameras, which I won't bore you with now, but thn we went around Edinburgh for a bit just to get used to the different settings possible for the camera. On the second day we were introduced to photoshop, and later went around the Royal Mile area in Edinburgh in small groups to take some snaps! The course was so much fun and I really gained a lot from it, and it actually inspired me to make this blog! Me being the youngest at the course (as usual) and the next oldest being 31, I was quite nervous going to it cause I didn't know what to expect but I am so glad that I went! Just incase your wondering my camera is a Canon EOS 1100D, and I really would recomment buying it! It's pricy but it's worth it:)
 
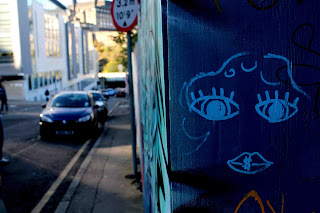
Anyways so all these picturs were taken on an amazing day, trust me it's not always this sunny, and don't let the sun fool you cause it was very cold! The purpose of the trip outside was to try and capture art and beauty where you wouldn't expect it and in a place that you would normally just walk past and not pay attention to. The pictures at the start show the Autumnal colours in their fullest, then we lead to pictures with many different angles showing a more abstract side, then leading to the graffiti and vibrant colours, then to the black and white photography incorperating the Scottish Parliament. All the pictures below were also edited with Photoshop, as I changed the levels, saturation and hue. I really hope you enjoy my slightly abstract photography, and I am looking forward to doing more blogs like this, aswell as my fashion blogs as I love both areas!
xxxx 


Saturday, 3 November 2012

Studding

Hey Guys!
So studding and military are huge trends this season, and studs are pretty much everywhere in the high street, but studded clothes can cost a lot of money. By knowing how to stud clothes yourself you can save yourself LOADS of money, trust me! It's a very simple process and one that once you know how to do, becomes very easy although may take up some of your time!
What you will need is the piece of clothing that you want to stud which could be anything from denim to leather to cotton. I used a demin shirt from Oasis that I thought needed a bit of vamping up and so I decided I wanted to stud the collar! You will also need a pack of studs, a pencil and a blunt knife. I got my studs from Amazon and were about £7 for a pack of 50, so they do come pretty cheap. Here they are if you want to order them: http://www.amazon.co.uk/dp/B006DJWWOE/ref=pe_217191_31005151_3p_dp_1
  

 The studs that I used are blunted tall studs but if you wanted to you could get the sharp, pyramid or star shaped studs that can also be ordered from Amazon. The studs with the two prongs are used for materials like denim and cotton(soft materials), where as studs are also available with a screw back that are used for leather:)
Firstly with your pencil you must plot out where you want your studs to be, but to be honest when you put the studs on, it doesn't have to be perfect as it adds to the look.
 As you can see I did one earlier (very Blue Peter) at the tip of the collar for practise, so in this example I am doing my second stud! You have to line up the prongs to the material to know where to put it and then push the stud through, hard! The denim in my case was quite hard to get through but you get used to it after a while:)

 Once the two prongs have completely made their way through, you take the blunt knife (nothing fancy, just one from the kitchen!) and push down on both of the prongs one at a time. Make sure you angle the prongs inwards so the studs definitely don't fall out!


 Once you have finished the first one and feel more confident you can carry on and do the rest of the studding. Here I just did the tips of the collar and didn't go the full way around but it's really up to you what you want to do!
 Here is the finished product with the half studded collar! It's such an easy process and something that will really save you loads of money, as I still have loads of studs left I can use on other things:) It's such a big trend this Autumn/Winter that it's something you have to give a go!


 Enjoy!! xxxx